How to test the Health Repositories
Please note: UI mockups in section are for illustrative purposes only and meant to provide general guidelines. Actual UI on application might be different or more refined.
HIU doctors can view patient’s health data only when your system is integrated with the health repository. To check if your HIP bridge is built properly and can be linked by a user, perform the following tasks:
Step 1: Download the consent manager app (Action by test patient)
- Download the APK from the following link and install it on your phone. Download .apk file.
- If you don’t have an android phone, then use an emulator to run the consent manager app.
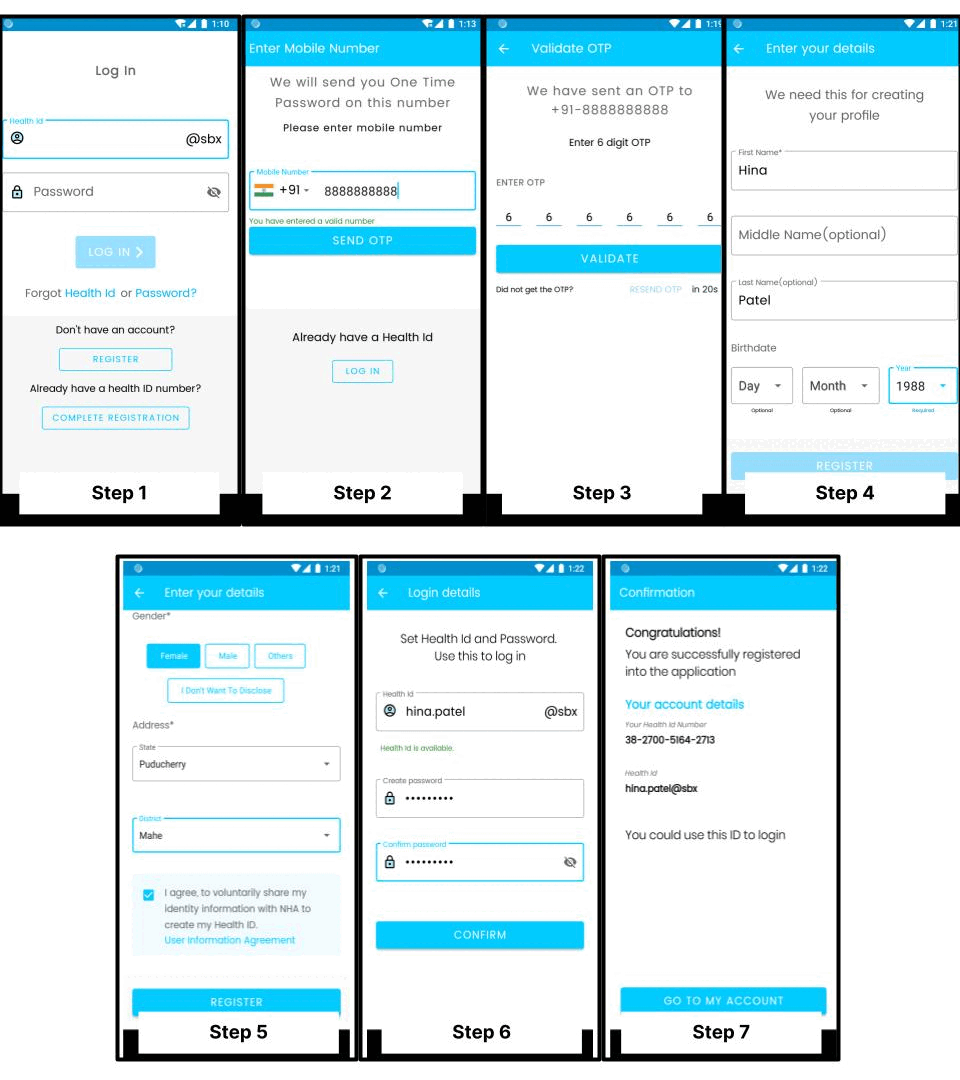
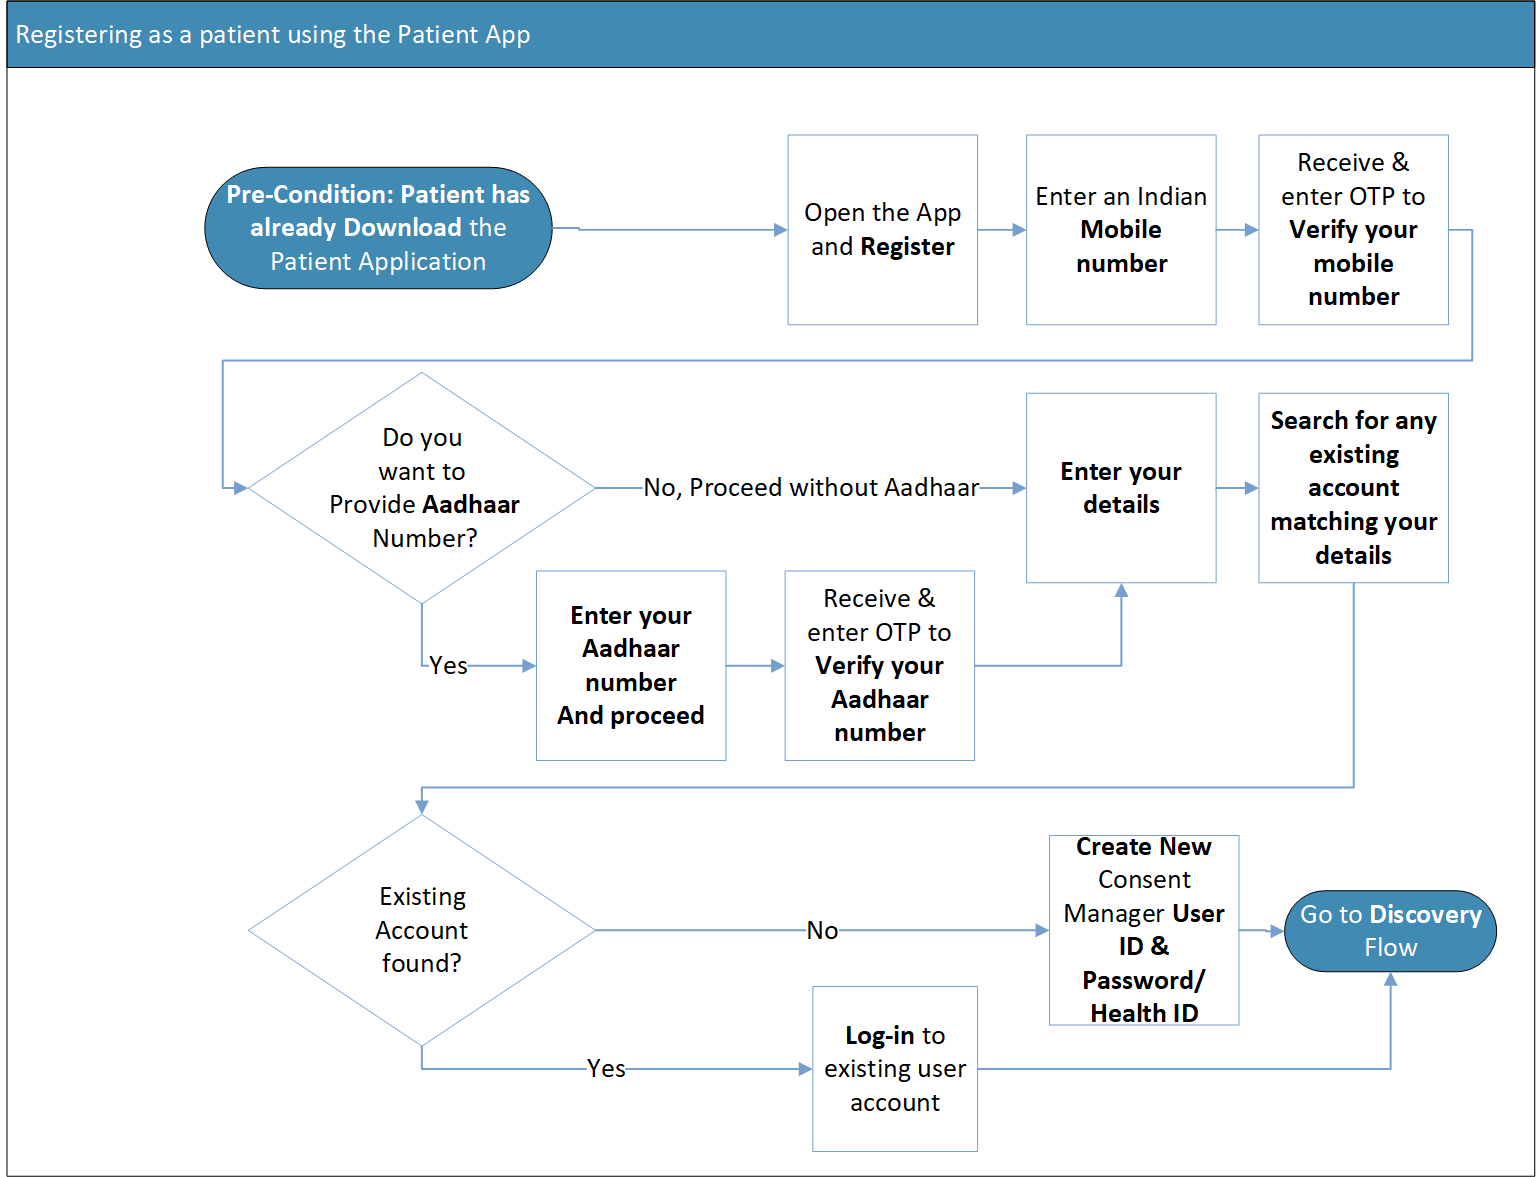
Step 2: Create a consent manager account (Action by test patient)
- Open the downloaded application and click on the Register button.
- Enter the mobile number of the test patient, as assigned to one of the test patients in your system. Ensure you have access to this number, in order to receive and share the OTP for further steps.
- Enter the OTP received on the mobile number, and proceed with the next step upon successful validation.
- Enter details such as the test patient’s name, gender and year of birth.
- Create a Consent Manager ID (CM ID) and set a password to the account to register into the system.
- After successful registration, make a note of the CM ID; you will need it for creating a consent request.
Step 3: Discover and link (Action by test patient)
- After registering as a consent manager, click on the + sign to begin looking for your patient records and to link to the facilities available.
- Search for the HIP that you represent, for example, the name of the hospital to which you belong. If you do not find it in the system, then the integration is not done.
- Search for the test patient’s records in the system. You will see the care context information provided by your HIP against the test patient’s mobile number, viz., name, year of birth and gender.
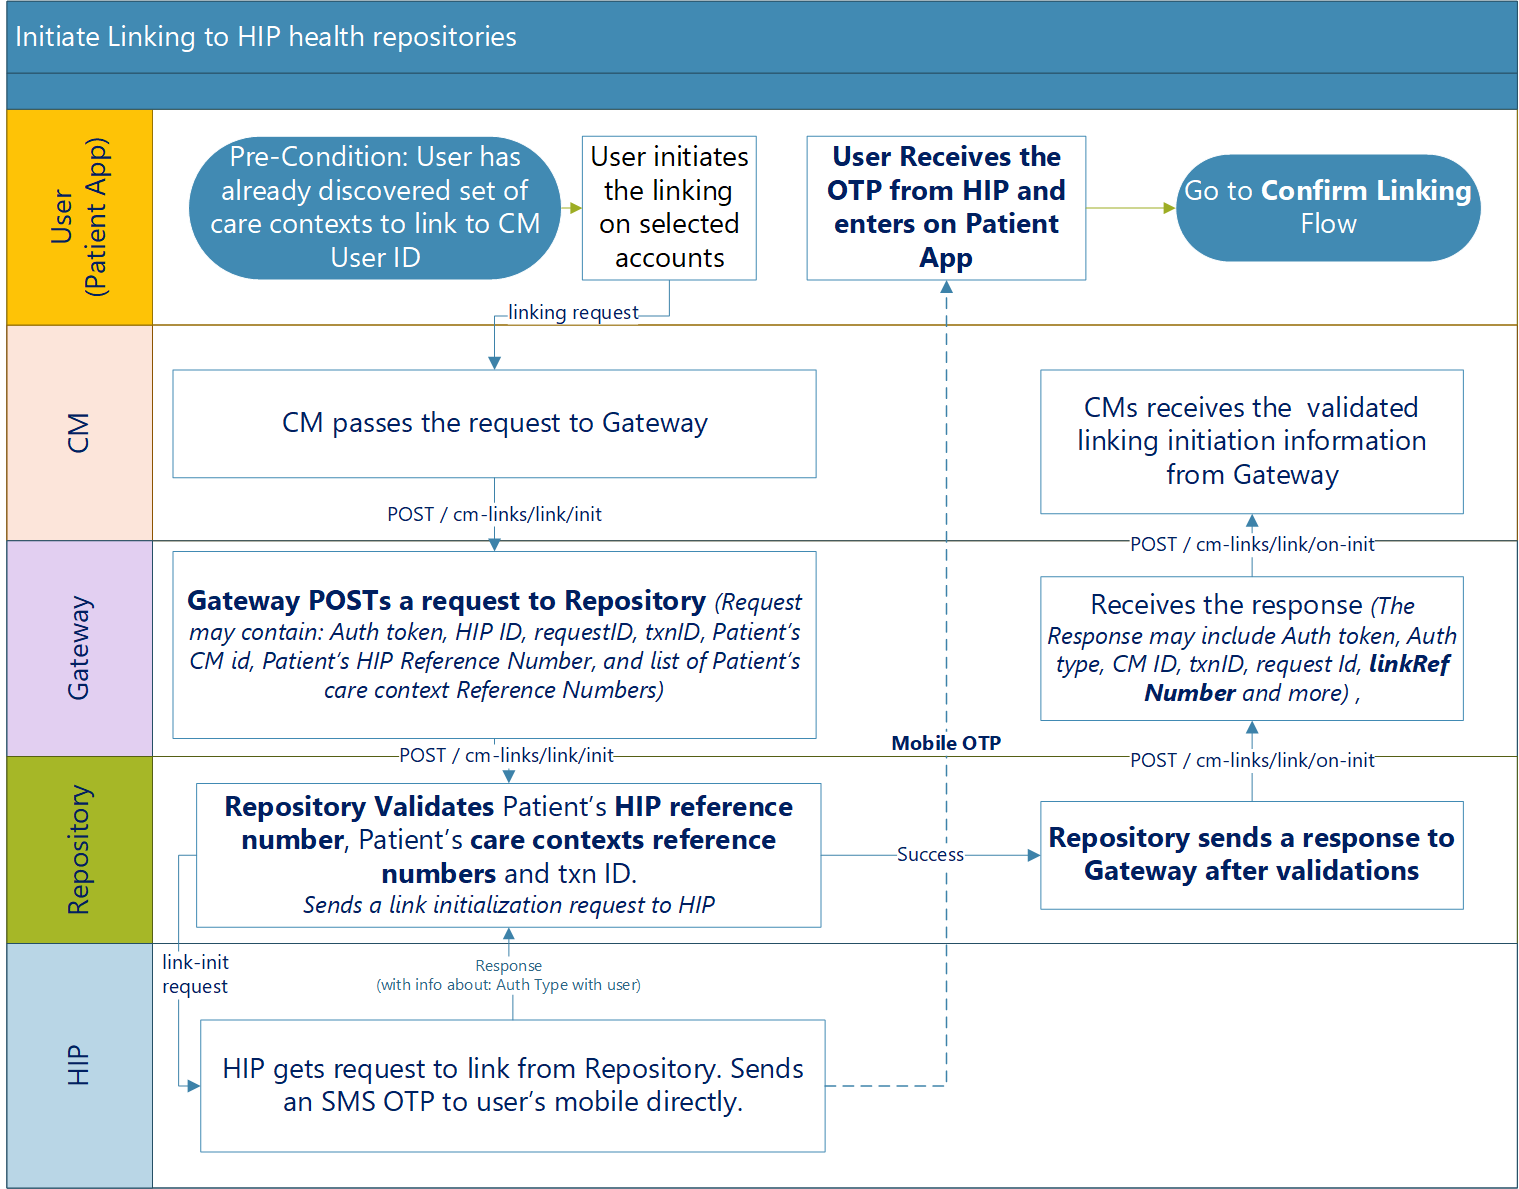
- Link to the care context; your HIP will send out an OTP to the test patient’s mobile number.
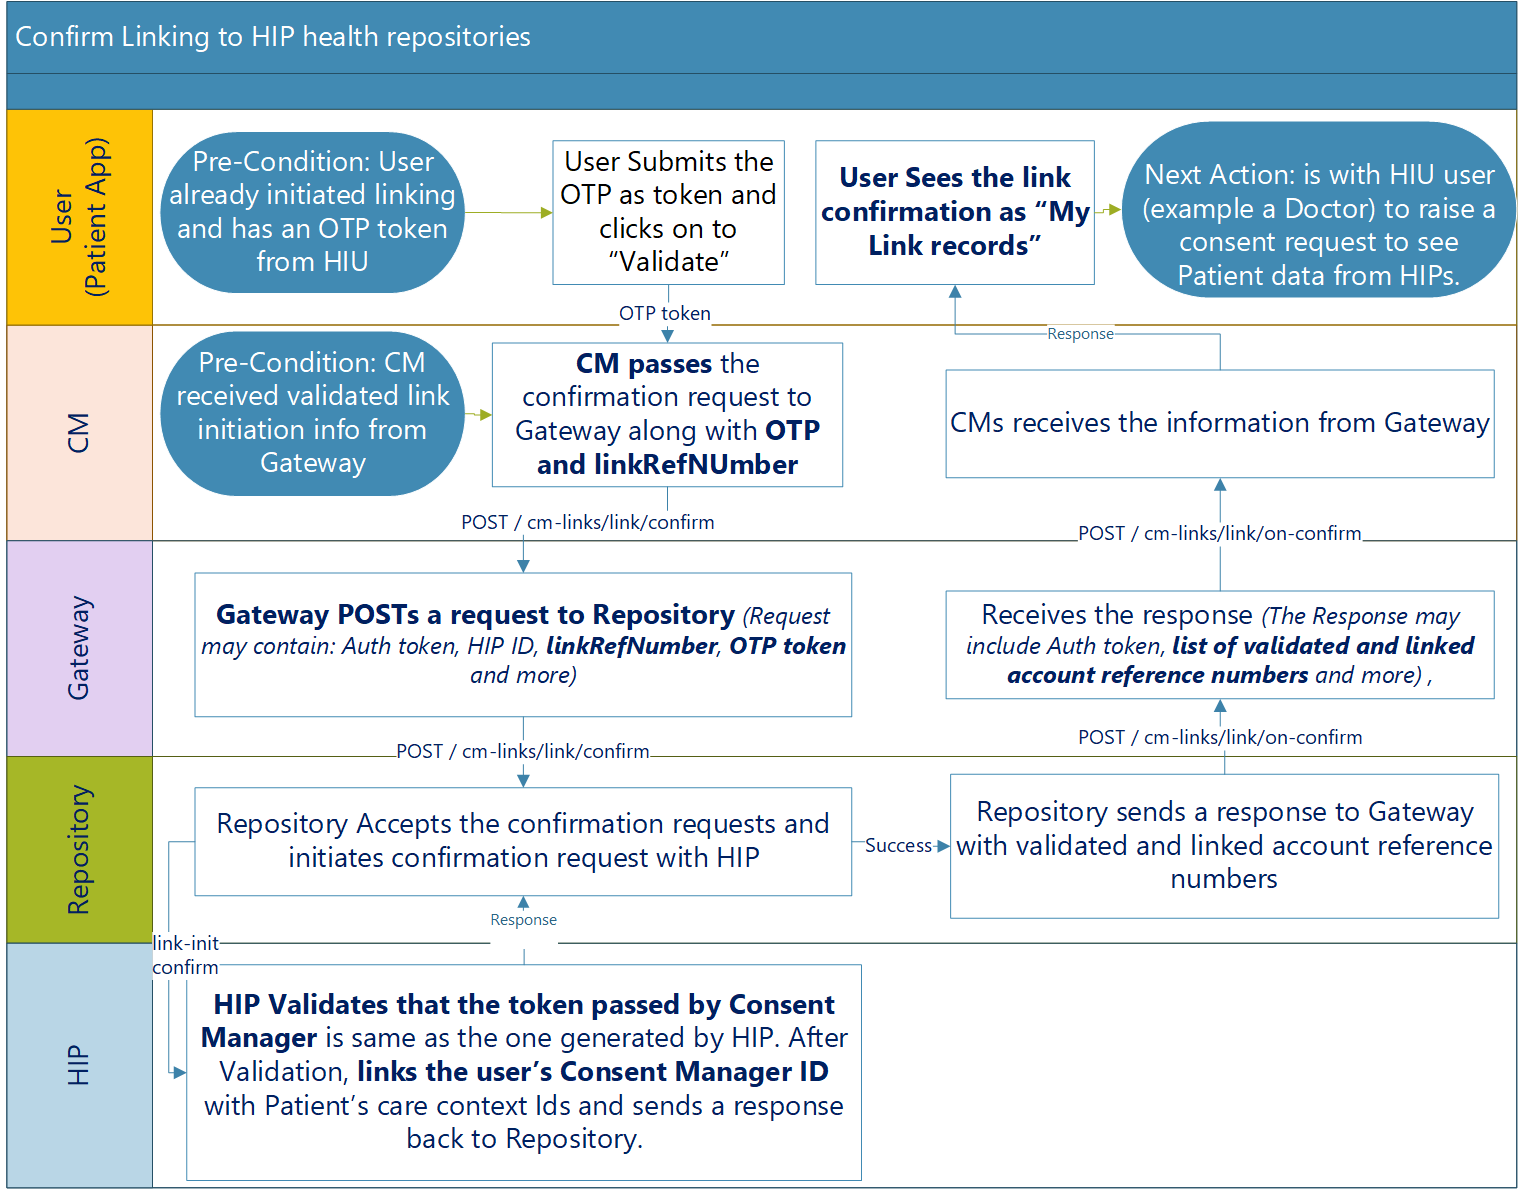
- Enter the OTP; after successful validation, you’ll be able to successfully link the patient’s record and care context to the CM ID.
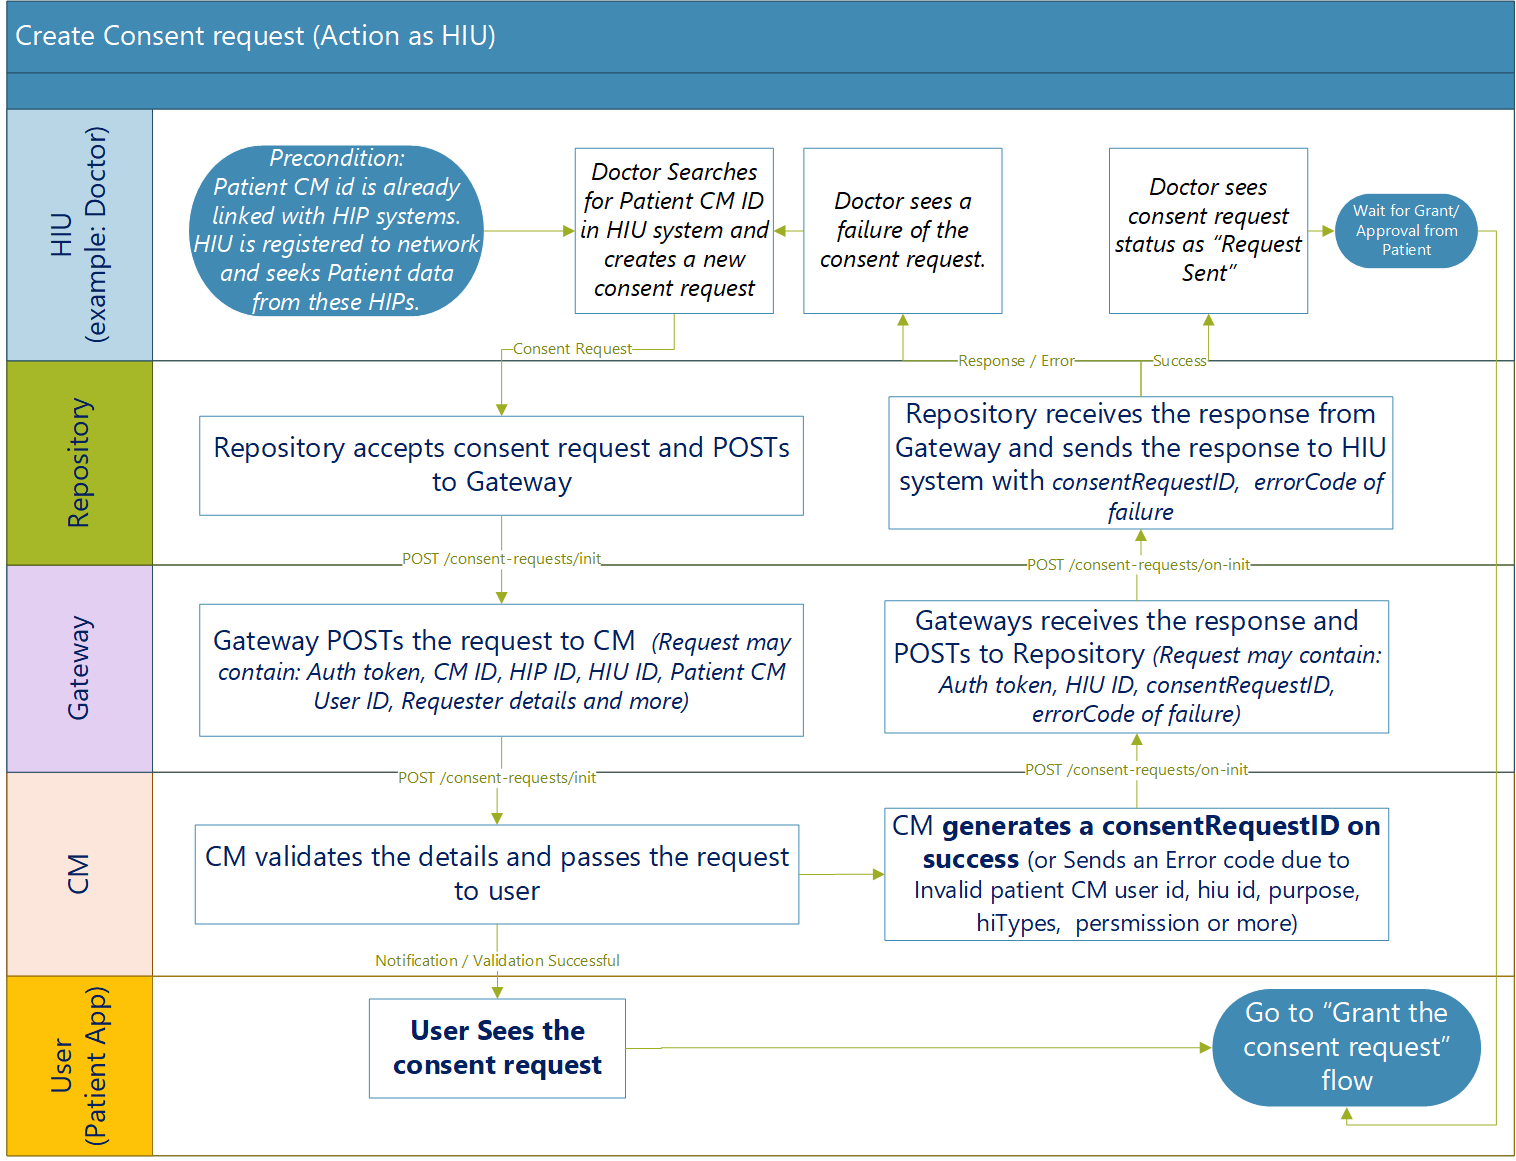
Step 4: Create a consent request (Action as HIU)
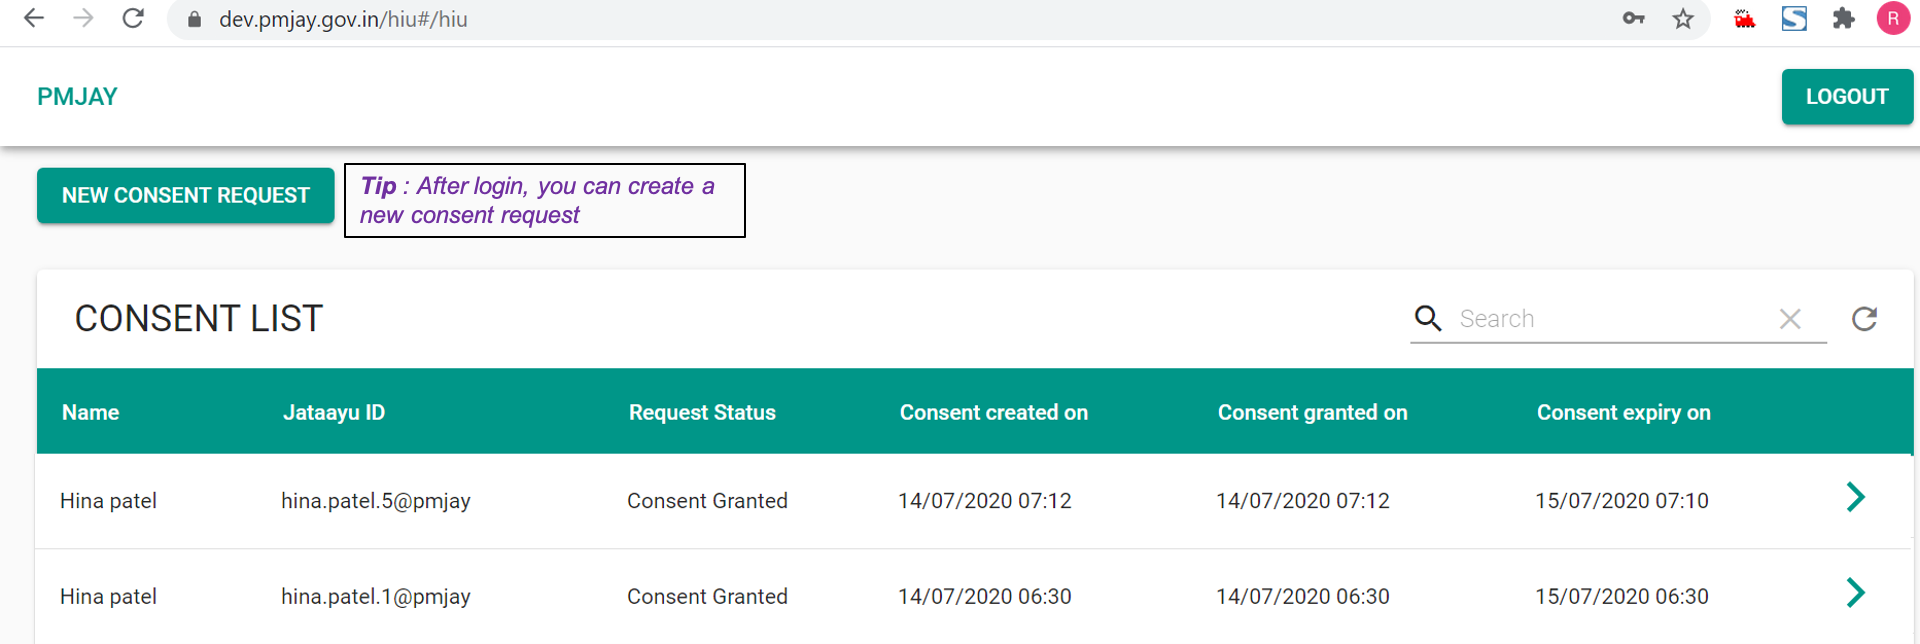
- Open the HIU application on your mobile phone.
- Login with your credentials. You will find the credentials in the email sent to you by the ABDM support team. If you don’t have login credentials, Send a Request to Integrate Your Test Environment. NHA will revert along with your login credentials.
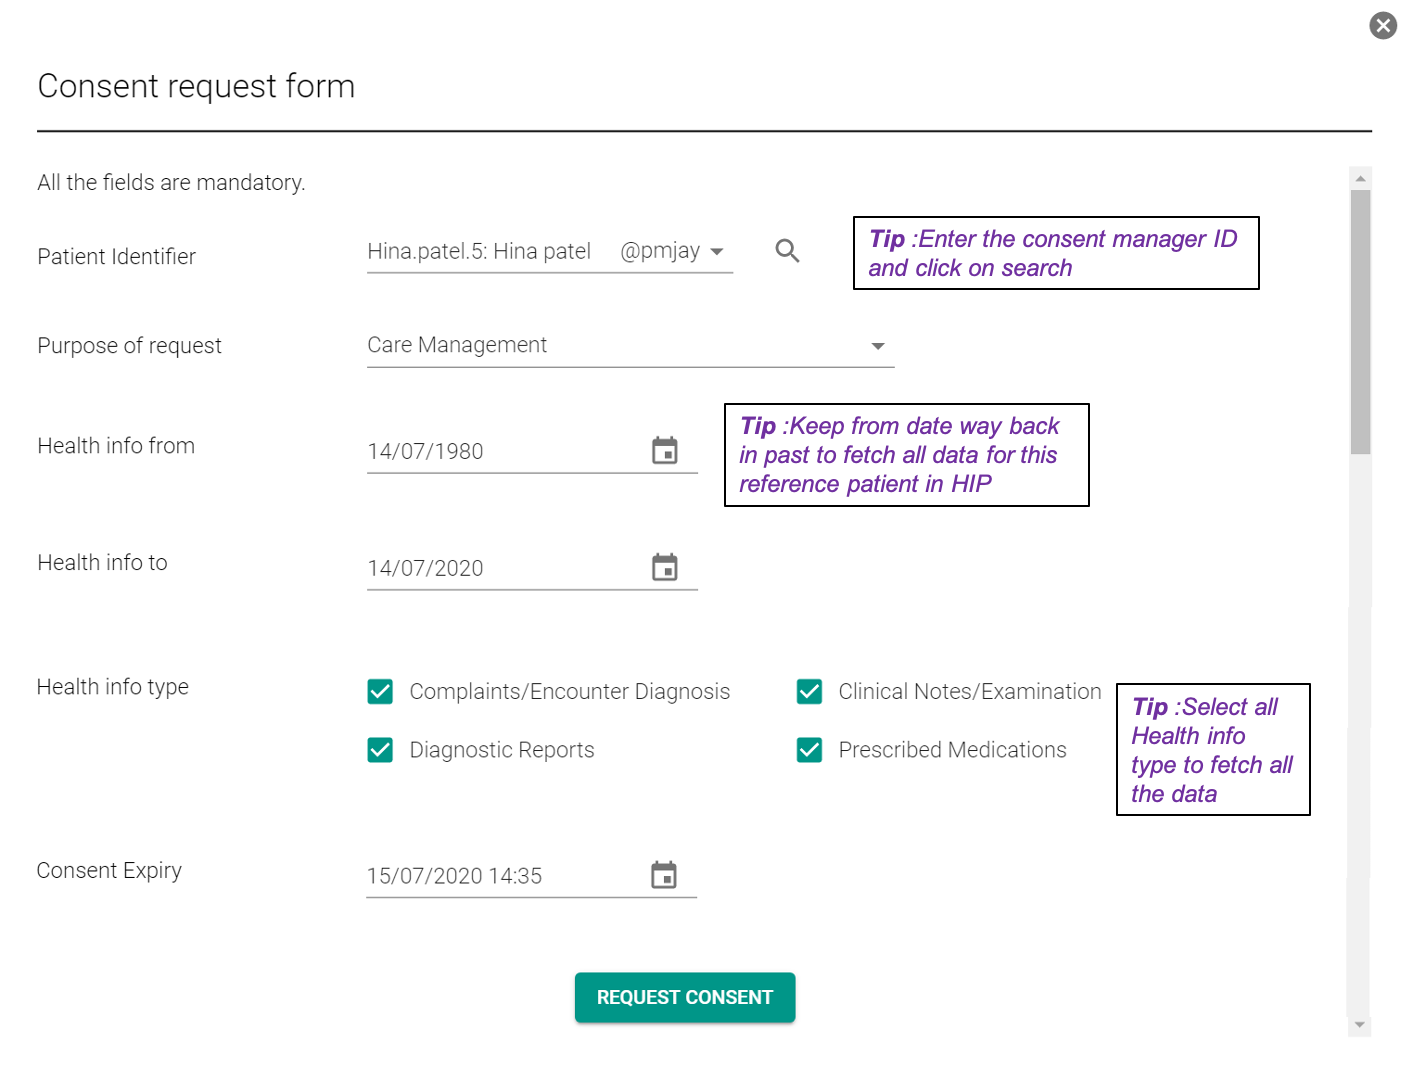
- Click on the consent request and provide the patient’s CM ID. Search for the CM ID within the system.
- Select a purpose for creating a consent request from the options displayed.
- Select a HI (Health Information) date range for which the test patient has records in the system.
- Select the HI types from the list displayed, for all the data present in your test environment for the test patient.
- Set an expiry date for the consent request; you will be able to access test patient data only until the date of expiry.
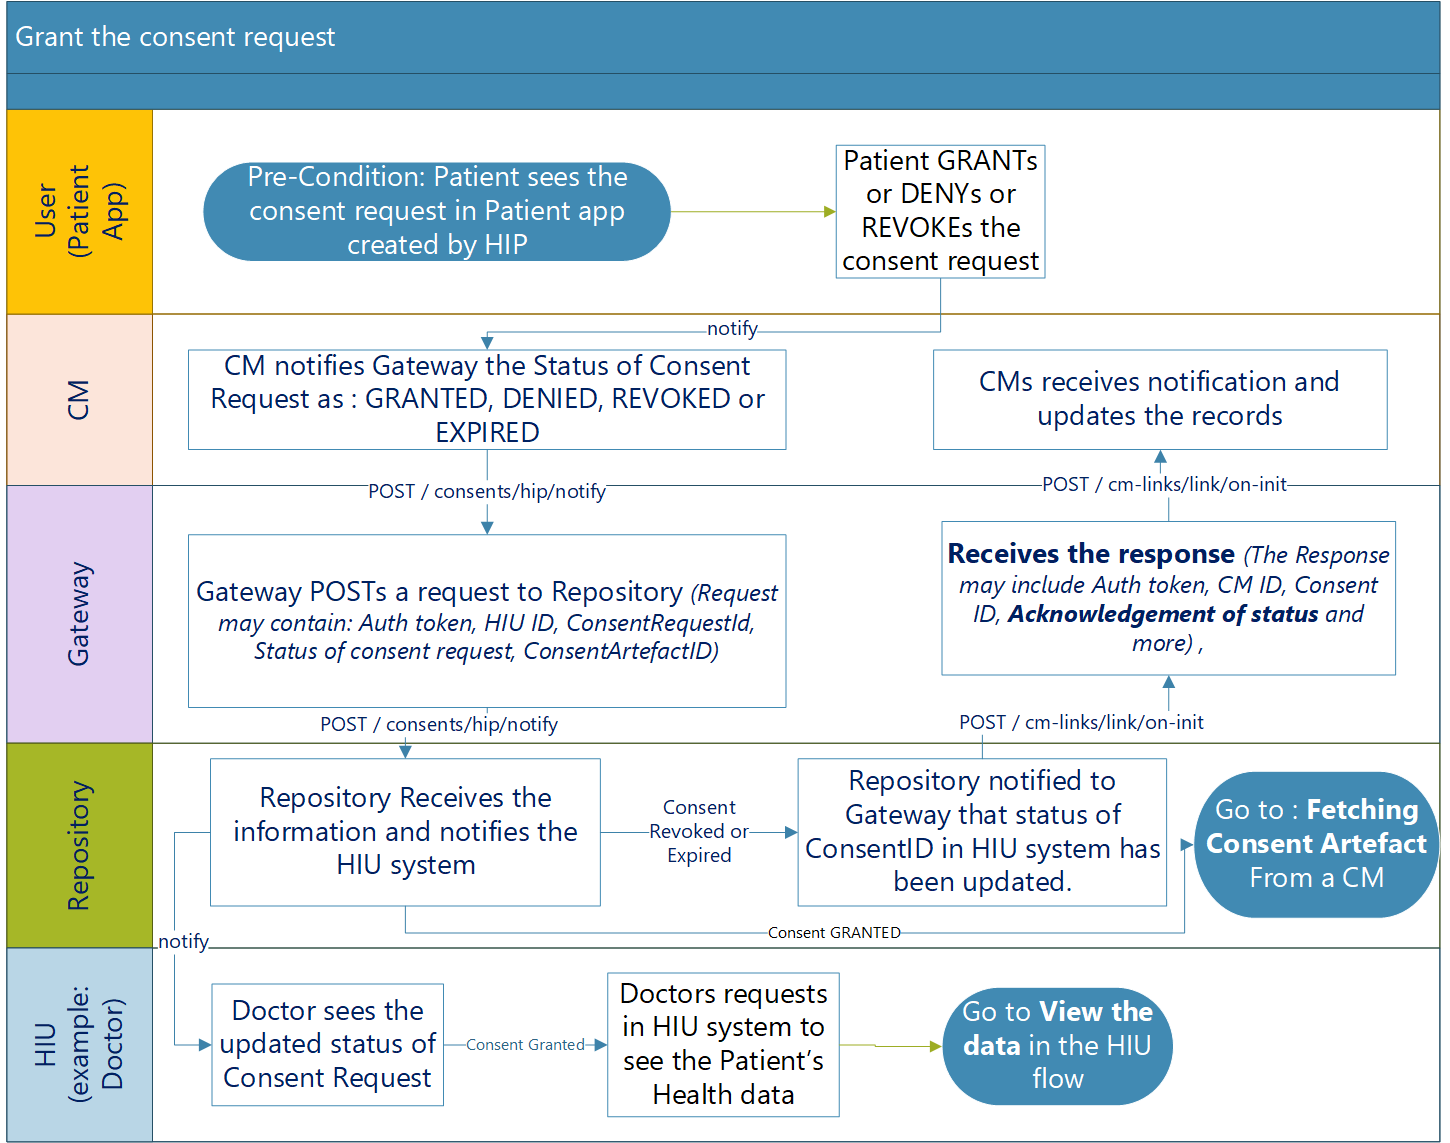
Step 5: Grant the consent request (Action by test patient)
- Open the Consent Manager app again and navigate to the consent requests tab.
- You will see the consent request which you created in the previous step.
- To grant the consent request, create a consent PIN. Confirm it; after successful PIN validation, the consent will be granted.
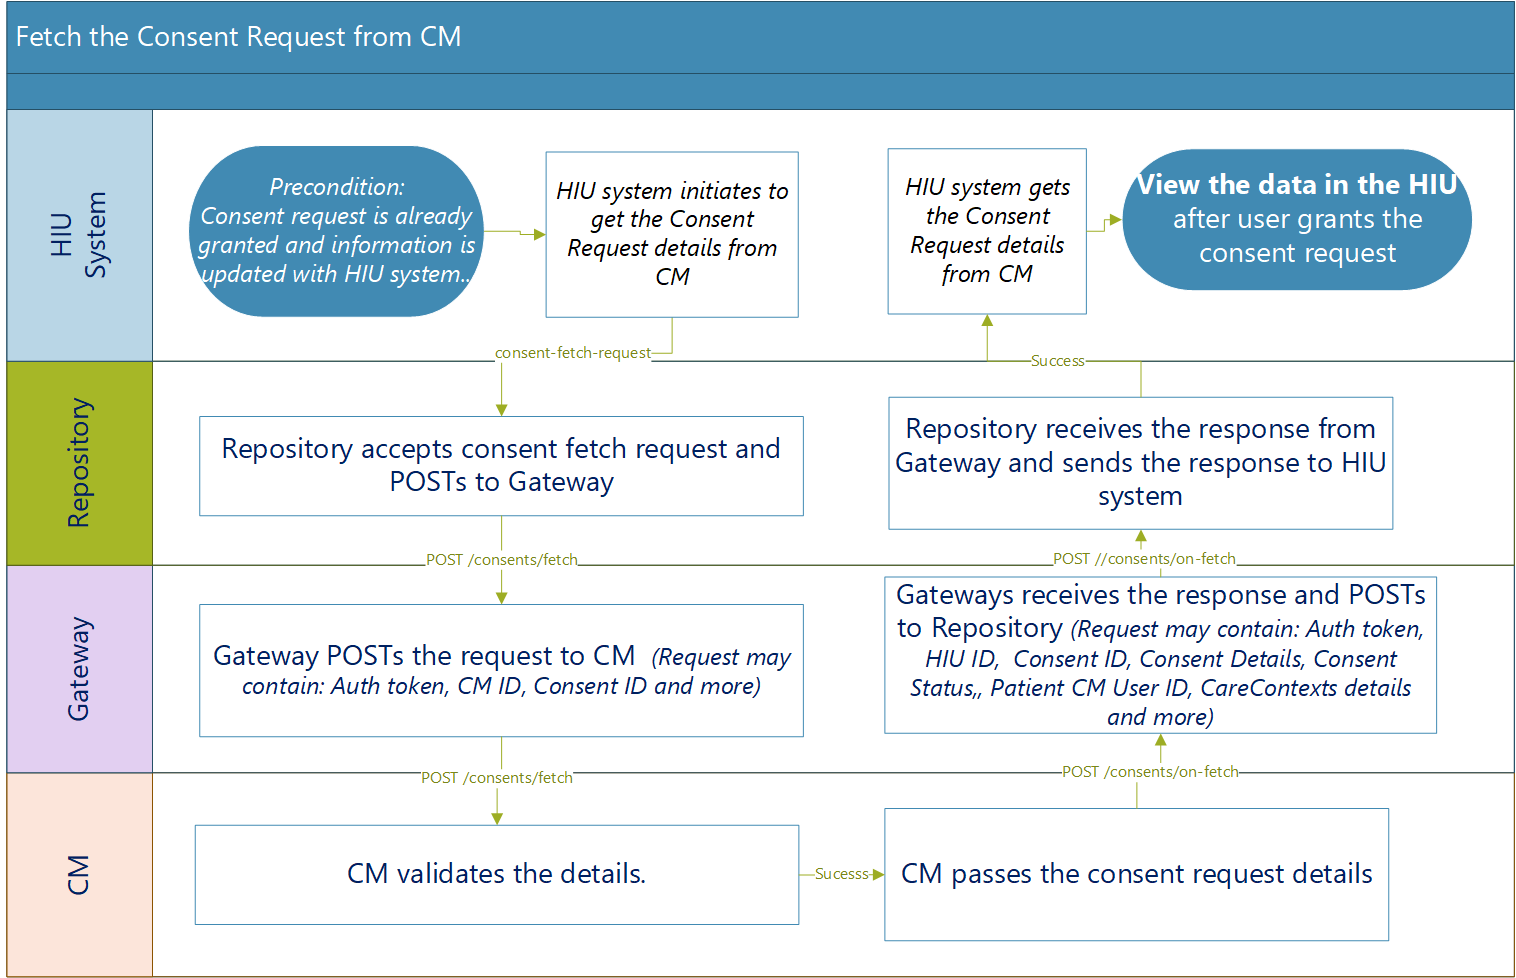
Step 6: View the data in the HIU after user grants the consent request (Action as HIU)
- Login into the HIU application again.
- Search for the consent request you created previously and click on it.
- You should be able to see the data sent by HIP for the test patient.
